1 day ago
Showing posts with label tutorial. Show all posts
Tuesday, March 15
DIY: Make a "Bunny Munch" Jar
I've been making little (and big) Bunny Munch Jars for some friends and co-workers who could use a little lift. It's easy, and it's a good way to use up some of my canning jars!
These can be made as healthy or as candy-laden as you wish. I have started eating a lot of Jordan almonds - delicious and healthy, too.
Supplies:
Canning Jar
Edible Easter Grass
Variety of small goodies to put inside
Take your clean, very dry jar, and pull off some strands of edible Easter grass. Curl them around your hand and place in the bottom of the jar.
HINT: If you don't have edible Easter grass, a good work-around is to take a handful of regular basket grass and put it in a plain baggie. Twist the baggie shut and place in jar, twisted side down, so that it doesn't open. If you're out of baggies, use a piece of plastic wrap.
Add in the goodies you want the recipient to have. I advise eating any and all "odd" looking pieces of candy. You know, the more I looked, the odder they looked, so I had to eat quite a few. *wink*
Screw on the lid.
Optional: Hang a tag from the neck of the jar, or tie some raffia or a ribbon around it.
DECORATION HINT: If you have a plastic or china bunny or fluffy chick, put a glue dot or some hot glue and glue it to the top of the lid! I often use a little salt shaker for my top decoration.
I was going for a rustic look, but the lid from the jar just pulled right off (and darned if it wasn't a new jar), so I hunted up a pink lid and went with that. There's no way to do these wrong!
Labels:
DIY / Do It Yourself
,
Spring and Easter
,
tutorial
Sunday, February 28
DIY: Turn A Metal Trellis Into A Message Center
I have long admired many of the metal climbing guides I find out in the garden centers of stores, and even in Hobby Lobby. They have elongated metal stakes to push into the soil, and the idea is that you place them near a seedling, and it will be "trained" to grow up the trellis or guide.
Out here in West Texas, the drought has put an end to my gardening. Our ground water is so salty some people are raising shrimp in it, and unlike the wealthy oil families, I can't have water trucked in. So I have another use for those small metal trellises.
My husband has made me little tables from cedar fence boards. I asked him if he could drill some holes and let me place the trellis legs down in the holes. Then I could use my little clothespins to hold notes, cards, and other paper goods in place.
He got out his drill -- the same drill he bought 40 years ago for 25 cents at a yard sale and repaired (he can fix anything) -- and drilled me the holes. Then I placed the legs of the trellis into them and had an instant "memory board," "pin board," or "message center," whatever you call it. Click the collage (not on the "P") to make it bigger.
My little trellis is made of mini chicken wire, and I got it from Hobby Lobby for $3.50.
I have quite a few of those padded fabric ribbon boards at home, and they get constant use. I needed another place to put my mementoes and messages, and the trellis just fit the bill. I'm putting my bills that are due on it, so I see them and don't forget about them, and a few sprigs of fake flowers, for cheer.
Tomorrow, I'm going to string up some pretty sea-blue twine, and use the clothespins to clip paper items to it. That won't be a "working message center," but rather something to use to display seasonal paper wares.
Labels:
DIY / Do It Yourself
,
tutorial
Friday, February 19
DIY Vintage-Style Chenille Figures for Easter or Any Holiday: Tutorial
It's easy to make vintage-style chenille figures.
I've gathered some cute vintage images so you can make a batch of them for decorating! I found most of these vintage images after I made a few decorations - now I want to get some white chenille stems and make some lambs, too!
After making a standing bunny, I've decided I actually like the plainer, non-decorated animal figures better. They look more "vintage" to me. My last photo shows a "plain" bunny. But if I try to make a little "Easter Bonnet Girl" using one of the vintage heads, I do believe I will make a little crepe-paper skirt for her.
Needed:
- Chenille "Bump" Stems in your choice of colors.
- The chenille stems I bought had three bumps total. I used regular scissors to cut them into two uneven pieces (one with two bumps, one with one bump)
- Cardstock "heads"
- Glue
Optional:
- Bit of ribbon, needle and thread to gather it
- Small piece of crepe paper streamer to put around middle
- Small bits of felt to glue on as "hands" and "shoes"
Labels:
Crafts
,
DIY / Do It Yourself
,
Spring and Easter
,
tutorial
Friday, February 12
Do It Yourself Puppy Bouquet for Valentine's or Any Time!
I wanted to get my husband one of those adorable fresh flower bouquets that are made to look like puppies or dogs. I think either the Japanese or South Korean florists invented these a few years ago. Ever since, I've wanted one.
I called the places advertising them online - and always the same response - "No florists in your area make those," or "Those are not available."
Wah!
I also wanted to make a bouquet for our veterinary hospital. They are the best vets I have ever encountered, and I have lived all over and dealt with literally dozens of veterinarians over the decades. These guys are the best, combining kindness with 100 percent accuracy in diagnoses and excellence in surgery - all at low prices.
What to do? I just HAD TO HAVE those puppy bouquets to give out!
I decided to make my own.
1-2 bouquets, with at least 12 blooms of the same size, color, and type
Bowl or short vase
Florists' "Wet Foam" brick or block
Animal Eyes, such as Bear Eyes from craft store like Hobby Lobby
Animal Nose, or black pompom or black Sharpie if using a daisy
Optional: Dog Bow for ear
Optional: Spanish Moss or Sheet Moss to help cover the foam
I tried to find a Youtube video, but there was not much there in terms of Do It Yourself. But there was enough to get the general idea. So here are some instructions on how to make a puppy bouquet:
I got out a small bowl and a block of "wet" florists' foam (from Walmart). I soaked the foam in water, cut it bigger than the bowl, and pushed it into the bowl. It's the kind of foam that comes dried, but absorbs lots of water and yet is soft enough to stick stems into, cut with a butter knife, and hold blooms at any angle desired.
Then I bought a bouquet featuring white daisies, mainly, and some other blooms as well. I really needed carnations or white pompom mums, but I was working against the clock (having gotten the idea late). I knew I needed at least 12 blooms of the same color and type and approximate size.
Dang! Daisies grow in bunches on long stems, with many of the blooms on SHORT stems. Yikes! I didn't realize that. I thought they were all on individual stems. So it was a bit hard to make the puppy using so many short stems.
If you try this, too, get a bunch of flowers that have greenery in them, or just get an extra bouquet of greenery such as ferns or salal leaves.
I stuck the daisies in to form the head (using a clump of them all growing from a single stem), then stuck in some more (growing on longer stems) at the sides of the "head" for the "ears." Then I stuck the "paws" in to make it look like the puppy's front legs were kind of overhanging the bowl.
I put in a very small, unopened red daisy to be a "tongue" at the side of the mouth.
THE PUPPY IS REALLY JUST A HEAD-EARS-FRONT LEGS design.
I placed some green Spanish Moss in the chest area, to cover up the foam block. That's where some greenery would really have come in handy, to put green fronds all around, as if the puppy was coming out of a bed of ferns or salal leaves.
I put longer stems of other flowers and of colored daisies in the back. Ideally, KEEP THE PUPPY using all one color (such as white or pink), and then DON'T USE THAT COLOR anywhere else. My puppy blended into the light-colored "filler" daisies a bit too much.
I couldn't get my hands on something called "Floral Glue." It's what the professional florists use to glue on the fake eyes and nose. So, I used my good old "Fast Grab" Aleene's glue and glued some bear eyes (sorry, teddy bear, for stealing your eyes) onto the centers of daisies where the dog's eyes should go. Then, lacking a nose (OMG, no nose!), I colored in the center of a daisy with a black Sharpie. A black pompom would have been good, but I couldn't find one.
I finished the dog bouquet off with a little pink bow put over one "ear." My dog is happy to see a bow leave the house - she is not one for bows, but I love her to wear them!
I think it came out okay for an amateur attempt, lacking some vital parts!
Labels:
Crafts
,
DIY / Do It Yourself
,
Florals
,
tutorial
,
Valentines
Wednesday, January 27
Sewn Paper Hearts from Book Pages: A Tutorial
On Pinterest, I saw a "Pin" that was very eye-catching. Someone had made hearts from the pages of an old book. They were written in a language other than English, in narrow columns.
I don't have the same columned paper to use, so I used paperback paper. Click my picture of my version, below, to get a bigger picture. Don't click the "P" unless trying to "pin" it.
But there were no instructions on the post where the hearts were featured. I took a good look and tried to reproduce them.
They were slightly filled, and the edges were sewn with a blanket stitch after being darkened with ink or chalk. Then a little vintage cut-out was pasted to them, and what looks like "caviar" was placed around the cutouts in a heart shape. The caviar was deep blue on the heart nearest the camera.
What's caviar? It also goes by the name "micro beads" and "micro balls" and I found it by searching for "nail caviar." It very much looks like little fish eggs! Alas, my caviar is taking its time arriving, so I put some big glitter on my hearts and called it good.
So, to make these hearts, find a suitable book - I'd suggest an old hardback with decent paper. I unfortunately used a very silly sci-fi paperback, and the paper was as porous and lousy as the plot. Hmph!
- Cut out heart shapes using a template (you can make your own, or use those below). Pull or tear out four pages, trace around the template with a pencil, cut through all four pages at once. Continue until you have enough hearts cut out. Each heart takes two pieces, m'dears.
- Now ink the edges with a nice brown ink or piece of chalk. A Prismacolor pencil will also do the job quite nicely if you have no ink or chalk!
- Sew a blanket stitch around the edges. When you have just a little bit still open, stuff a bit of cotton fluff or a bit of tissue paper in there, then finish stitching.
- Print out some likely images, or get some old Valentine reproductions and cut out shapes or heart shapes
- Glue to the middle of the hearts
- Take your glue (I do like that Aleene's Fast Grab very much) and apply a thin bead where you want the caviar or glitter, and shake or spoon it over the glue very quickly.
- Shake off excess.
I think they look fine in a canning jar, or in a nest, or really tucked anywhere you like. I think five is the minimum to make. Wish I had made more, and maybe I will, as soon as the caviar arrives.
Labels:
Crafts
,
tutorial
,
Valentines
Tuesday, January 26
Pretty Pom Poms from Vintage Dress Pattern Tissue Paper Tutorial
Now dearies, when I went to that Antique Junque store, I grabbed up some bundles of dress patterns. I think it was six patterns for $1. Some were old and some were more recent.
I didn't want the patterns for themselves, but to use to make some "shabby" pom poms. I saw them decorating another booth, and just had to make some for myself.
I'm the person at work who makes pom poms for birthdays. Whatever the person's favorite colors are, I make pom poms in those colors and decorate their offices with them, along with festoons of crepe paper streamers and tissue paper confetti. I made the pom poms at my desk today. No one batted an eye, because I'm always making a pom pom of some sort. And with oil down dramatically, I didn't have a lot of work today.
To make these, try to find either uncut patterns or patterns for adults (I bought a pack with too many kids' patterns), and preferably for large items like skirts. That way you have a lot of tissue to work with, and can get quite a few from each packet.
For a small to medium pom pom, stack at least nine sheets of tissue. I cut mine into rectangles about the size of a sheet of letter-sized paper for my largest pom pom, and smaller for the little ones.
Then fan-fold the paper. Don't go too thin, and don't go too wide. And press down very hard to put a good crease. Then twist a long wire (or a piece of string) around the middle of your pleated sheets.
Now cut the ends into a rounded shape. Cut pretty far down on each side; don't just round the very ends (it hasn't been rounded yet in picture below). Gather the pleats, round with scissors. You are giving a nice rounded petal shape to the edges of your pom pom.
Then start making your pom pom. Pull up the first sheet of tissue towards the wired middle. Be gentle. I do a 3-step pull: Pull one side, then the middle, then the other side. I do about three sheets, ONE AT A TIME, then I switch to the other side of the pom pom and pull up three, ONE AT A TIME. Keep pulling up, switching from side to side.
Now flip the pom pom over and work on the "underside." Pull up three on one side, then three on the other, and keep switching off.
So, you're working it two ways: Each SIDE, and each END.
You will end up with a fluffy ball. I use the ends of the wire to attach the pom poms to things.
One thing that is so cute is to just pull up one side of the pom pom. It makes it like a flower, with a flat base. Fun to just sit on a desk or atop a box or can or a gift.
There are many better tutorials for making pom poms. Try Youtube!
Monday, January 25
Add A Knob to A Jar Lid Tutorial
Well hello, dearies, and Happy Monday. If TGIF means "Thank God It's Friday," what does OSIM mean, I wonder.
Oh, I love every day! I like getting up early and getting to work.
I've been placing drawer knobs or drawer pulls on canning jar lids for ages, well before "Mason Jar Fever" set in with the hipster bunch. And I thought I'd put up a little tutorial, so people could see how easy it is. And wouldn't you know - the day I decide to do so, I stopped by Michael's Arts & Crafts store only to see an entire BIN full of jar lids with knobs, for less than the price of a knob. Well!
But - with knowing how to do it, you're not limited to their selection, and when canning jars fade out of favor, you'll still know how to do it. When choosing a jar lid, be sure to use a one-piece lid. The two-piece lids don't lend themselves to it very well, but you could use a two-piece if you like, and certainly you can if the jar is decorative and you won't be using it alot.
The tutorial is simple, and here's what you need:
- Jar lid
- Drawer Pull
- Hacksaw for metal or side-cutters
- Hammer and nail that is slightly wider than the width of the knob's bolt
- Piece of wood, like a 2x2, or other small piece to fit under the lid, so that when you hammer the nail in, the lid does not dent down (if using a hammer and nail)
If you have a hacksaw for metal, use it. Otherwise, use some side-cutters.
- Take your lid and mark the center. I just eyeball it. My husband tried his fancy geometry stuff and put the hole off-center.
- Tap a hole into the lid, at the center mark. I used a nail and hammer. Husband used a drill, to avoid flaring out the lid, but mine worked fine, too. Put the little piece of wood underneath the lid, and tap in the nail from the top of the lid (the good side) down. Pull the piece of wood off the nail and remove the nail.
- Get the knob ready. Snug up the nut on the drawer pull to near the bottom of the knob. BUT don't screw it up all the way, because you need to leave some room for the thickness of the lid, and you need to have a bit of bolt sticking out from the nut. Please see the photo of where the side-cutters are going to cut. Note there is at least an extra thread showing between the side-cutters and the nut and washer.
- Use a hacksaw to cut, or if using the side cutters, you will have to squeeze, rotate a small turn, squeeze, rotate, etc. Then when you are back where you started (might have to go around a few times if you cannot squeeze hard), you turn your wrist towards the floor (still squeezing with the side-cutters) and pop the end of the bolt off. It will shear off. Discard the bit of bolt you removed.
Note: Cutting the bolt shorter messes up the threading. You must leave a bit of the bolt sticking out of the nut. That way, you can use the nut to "rethread" the messed-up part of the bolt where you cut it shorter. It straightens the threads and allows you to take the knob apart, place into the hole, and replace the nut on the underside of the lid, along with the washer, to hold the knob in place.
- Take your knob and remove the bolt. Place the knob's bolt through the hole in the lid, then turn lid upside down, place the washer onto the bolt first, then the nut, and snug the nut.
As always, thank'ee for stopping by. I used to confuse which was the "nut" and which was the "bolt." I finally managed to keep them straight by thinking of the bolt like a lightning bolt - the piece longer than the nut.
Sunday, January 3
Roses in Winter - Printable Sachet Envelopes
Today and tomorrow I'm posting printables for your creating pleasure.
I was admiring the potpourri envelopes at Cracker Barrel Old Country Store the other day. I think they are wonderful in both design and scents, but they are not good for my pocketbook.
So here are some smallish potpourri/sachet envelopes to print, cut out, glue, and fill. Once filled, you might even want to take an old hatpin and poke some holes around the flower designs on the front, to let the scent out a bit more.
I printed out three sheets onto cardstock at Office Depot to make these mock-ups, but I think PAPER would work better, unless the cardstock is quite thin. I think paper just "gives" a bit more, and it lets the scent out better.
Remember to click, click again if you get a little magnifying glass with a "+" in it, then right-click to save. Click somewhere other than the center or the silly olde Pinterest "P" will send you to Pinterest.
Here are the instructions, followed by photos:
- Print out however many sachet envelopes you need.
- Cut them out
- Score (if you can) the folds, then fold
- I have kind of a double score-mark on the envelopes, in case you want to put quite a bit of filling in them. You'd need to score both lines to make a fatter pouch. I decided to just put in a little scented material and not mess with any extra scoring and folding.
- Glue the thinner of the long sides to the wider of the long sides. The long sides don't have curved parts to them.
- Fold up the bottom flap (curved) and glue it atop the seam you just glued
- I used FAST GRAB glue but thinly applied hot glue might work
- To let it all "set" well, I put a heavy book on it for about a minute
- Spoon in the scented material you wish to use. I used lavendar and cinnamon. I know the picture shows cloves, but I put them back and got the cinnamon
- Now glue down the final flap, which is the top flap. I stuck the top part back under the heavy book to set the glue
Thank'ee for stopping by. Tomorrow the sachet design features violets.
The instruction photos are in the opposite order they should be, and I'm too naughty to fix it.
Monday, December 28
Time for A Little Winter Light
My dears, we must keep our spirits up. When the holidays are over, a melancholy can settle upon one, even if you valiantly tried to stave it off. Some lucky souls aren't troubled by winter bleakness.Besides planning a "Twelfth Night" fest, I also make sure to have a "substitute" ready for when the tree comes down.
I keep a string of lights out, and use it to decorate a little birdhouse I have. I usually have it decorated all the way through spring, first in a "frost" motif, then Valentine's Day, St. Pat's, and Spring. The corner where the wee tree stood doesn't look so lonely that way.
This is the current birdhouse. I have a peach and pink berry garland twined around it, along with white lights. Fake succulents are stuck in the openings and at the bottom. It looks more springlike than it appears here. The berries look quite peachy in real life, without a hint of any autumn undertone.
It's prettier in person than it looks in the photograph.
Here it is lighted up (with each bulb painted over with a "parchment" hue of acrylic paint, so that it gives a softer glow), and in the corner where the tree stood:
Here, too, are some Valentine's tags. If I don't get a running start on a holiday, I end up in a terrible rush. Yes, dearies, always look forward.
Review the "How to Save Images" advice in the upper left corner of the sidebar if you don't recall how to save images that appear in my posts.
Thank'ee for stopping by. Tomorrow, MORE lore on Twelfth Night!
Labels:
Crafts
,
tutorial
,
Valentines
Tuesday, December 22
Homemade Firestarters from Old Wax Tarts
I had to go back and change the title of this post, dearies. It read "Homemade Firestarters from Old Tarts," and that just did not sound polite.
My planned post was going to show how I would take used-up scented tarts that have lost their scent from being warmed so much, and turn them into fire-starters by pouring the melted wax into paperboard egg cartons. Alas, the egg cartons proved unworthy, and dripped hot wax all over, even though the cells looked sound. Holes appeared when I poured, and I guess it was a "holey mess."
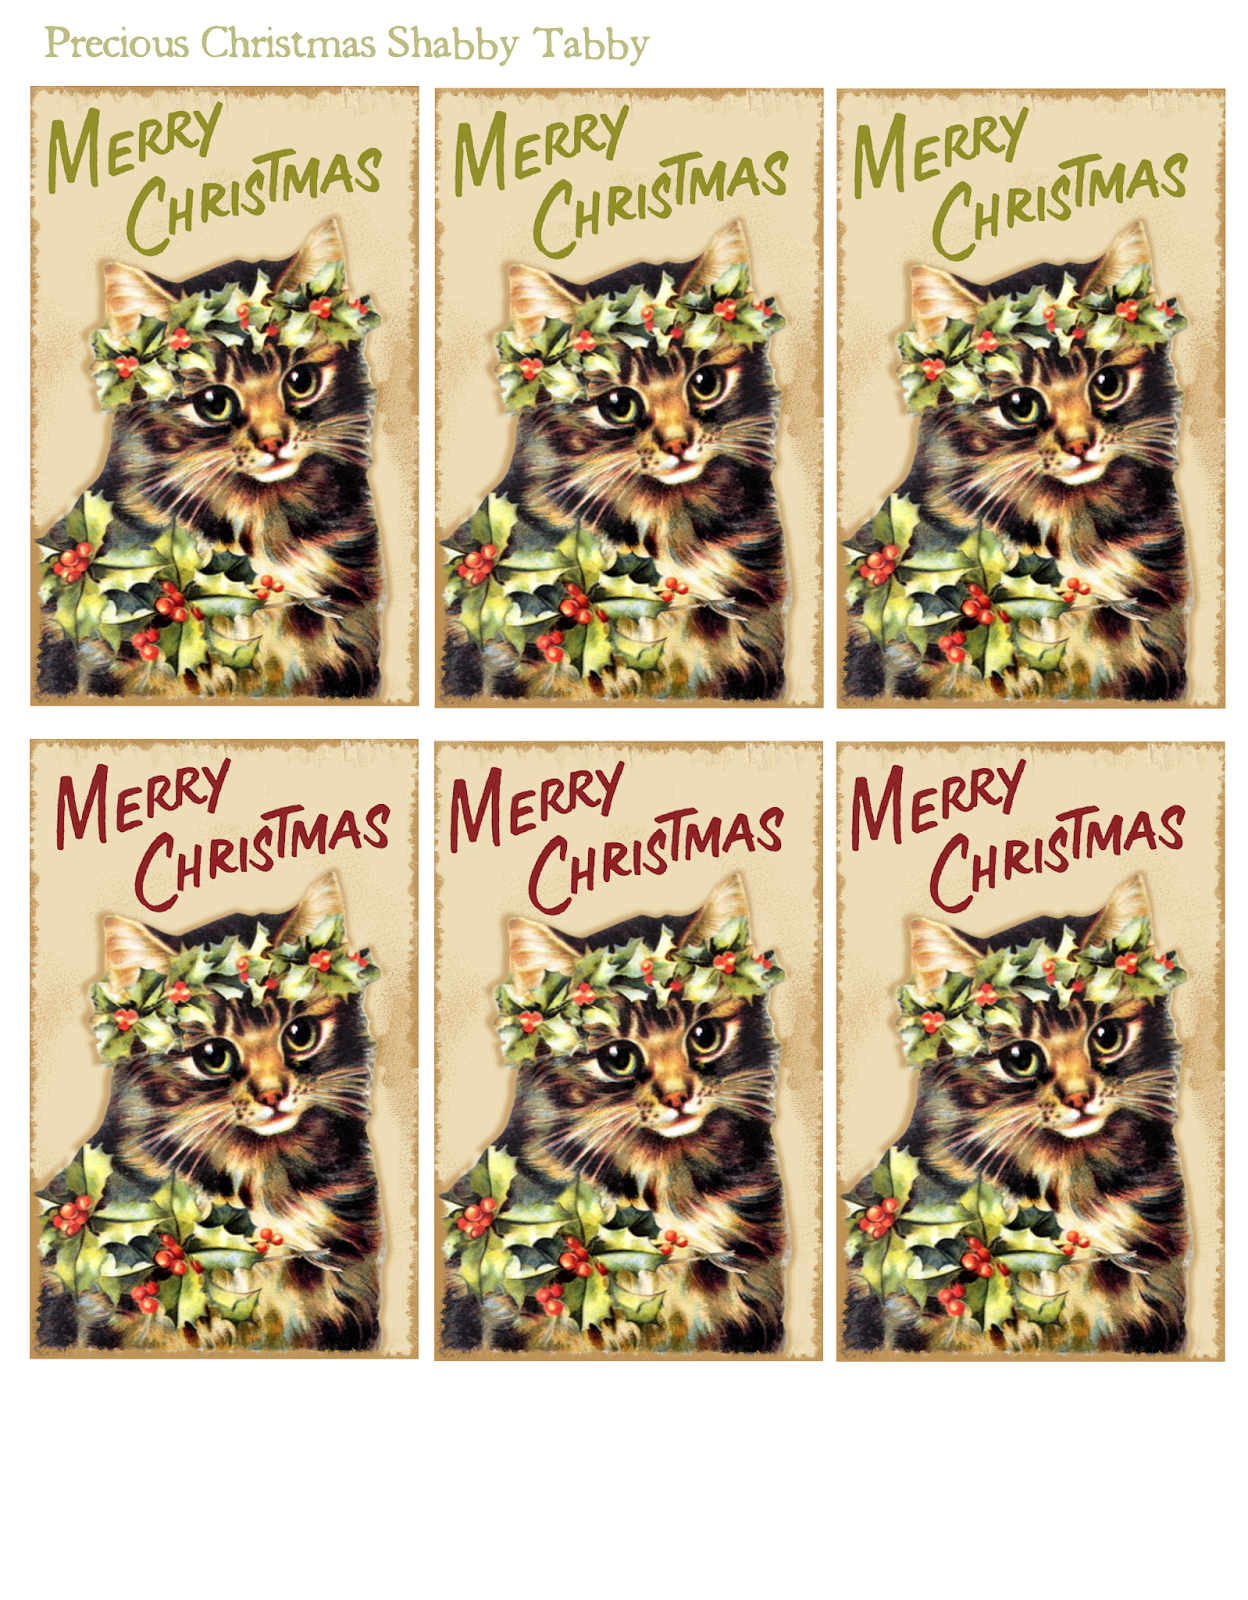
I interrupt this sad tale to place a free page of Tabby Tags here. Rest of story is below the tags. Remember to click, click again, then right-click to save sheets of tags. Thank ye.
Anyhoo, I will say that my OTHER method of making firestarters does indeed work. I take either fast-food bags and put one inside the other, or use lunch bags (they are thicker), singly. Then fill with pinecones about 3/4 full. Try to get the cones that are still young and haven't opened much, because they pop and spit delightfully while burning. Lastly, pour in the wax on top of the cones. Close up the bag and it's ready to put under some logs and and light.
Posted below are some "thank you" tags with a colonial motif. I guess I'm just tag crazy, because I use them for everything.
Thank'ee for stopping by!
Monday, December 7
Do It Yourself Easy Stamped Rustic Tile Coasters in Minutes
Halloo dearies! This past weekend I set myself to making stamped tiles for my co-workers this holiday season. It's quick, pretty, and inexpensive if you already have some rubber stamps. The tumbled marble and quarry tiles I used, from Home Depot, were about 44 cents each (but they come in a pack of 9).
I don't like to join in the "Secret Santa" or "White Elephant" events at work. They go so over the top that it's unaffordable, and there's always anger and greed in play by the time it's over. So I just make some little things and give them out by placing on the kitchen counters with a "free for you" sign.
The key to these tiles is using "Stazon Ink." I have seen other tutorials that use latex paint, commonly called "housepaint" and also sold at places like Michael's as paint for terra cotta pots, but I didn't use that myself so I can't vouch for it. It seems it WOULD work, though.
If you have a little set of alphabet stampers, this is the time to bring them out!
I used beeswax to seal the tops of the tiles. I have a huge beeswax lump for polishing furniture and my cabinets, but you could probably get a natural candle or the small lump sold at many sewing shops for thread waxing, and use either of those. And I think the paraffin blocks sold at a lot of groceries for sealing jellies and jams would also work well.
NOTE: MANY without latex paint or Stazon Ink USE A SPRAY-ON gloss or matte sealer and have good results with regular inkpad ink images staying on but darkening quite a bit. I am just into beeswax lately.
Here are the supplies needed:
- Rough Tiles (NOT SEALED OR GLAZED TILES). I used ~3.5 x 3.5 inch "tumbled marble" and "quarry" type tiles.
- Ink or Paint
- Rubber stamps
- Beeswax or paraffin
- Felt stick-on "feet"
- Old white cotton rag or really good paper towel
Here are the steps:
- Wipe the top of the tile
- Choose a stamp or several stamps and stamp a design you like
- Let the design dry (takes only moments with the ink - go on to the next tile while the first tile dries)
- Stick on (or glue on) felt or cork feet on the bottom of the tile
- Take beeswax lump and rub over the top of the tile. I push little bits of the wax into any nooks and crannies.
- Take the rag and buff the wax into the tile; turn rag to clean area and buff excess off of the tile
- Set aside for the wax to "dry" - I let them sit overnight before giving away or using.
I use my coasters as spoon rests, too. The beeswax keeps liquids from soaking into the tile. Special note: The wax darkens the tile somewhat. Not dramatically, but a bit. I wanted my tiles darker, to sort of "blend in" the brown ink into the background of the tile, so I was happy at the effect.
I tried pigment inks and archival inks, and neither stayed on the tile. Stazon was the only ink I had that really stuck to the tile, as sticking was important since I wasn't sealing it with a spray. I bought my inkpad off Ebay.
As always, thank'ee for stopping by.
Monday, November 23
How to Make Snow Globe Dioramas for Christmas and Holidays
Snow Globe Dioramas: I saw something similar for sale in kit form and decided to make my own, and share the tutorial.
The main materials needed are two-part plastic sphere ornaments -- the kind with a double hook holder at top, so that when pulled into two parts, each has a little hanging hole for a hook or piece of ribbon or cording (see the pictures). I had to order mine online; neither Hobby Lobby nor Michael's had the kind I needed.
Other materials are:
On the circle, glue down (I use glue dots) some batting or cotton, cut into a shape or angle to represent a little hill or snowy foreground.
Atop the cotton "snow," glue down the stickers or little paper shapes you are using. I used little shapes from some cardstock confetti, and some small stickers, to make a scene. I could have trimmed the back of a sisal tree and glued it in place with hot glue, to make the scene more dimensional.
I double-placed each animal cutout, by placing one cutout, putting a thick glue dot on it, and placing another identical cutout on top of it, to make it dimensional.
Now you place some fake snow into the half globe and hold it like a little bowl so it doesn't fall out. If you forget to add the snow into the little globe bowl (as I did), you'll have to partially glue the circle down, pull out the top of the circle as shown in the first picture, and put some snow in. I put clear big glitter circles in one globe, and tiny styrofoam balls into the other globes. The fluffy fake snow in a bag would also be pretty.
Put slow-setting hot glue around the edge of the half globe, and place the cut-out circle against it, with the scene sealed inside.
MAKE SURE that you have the scene oriented correctly before pushing the circle against the globe's edge.
Now you can put some glitter, tinsel, cord or ribbon (or nothing) along the edge to disguise where you glued the circle to the globe. I put more hot glue and then dabbed the edge into glitter poured onto a paper plate.
Not Shown:
Pretty Scallops: You can get a scalloped circle somewhat larger than the back of the ornament, and glue it to it, to make a pretty "frame" around the scene.
Stand-up Scenes: To make a stand-up scene to go atop a Mason jar or other jar or box, it's a slightly different process. You can get some tiny sisal trees and figurines (I have some tiny deer I got in the dollhouse section of Hobby Lobby) and put them on top of some batting or cotton glued to the cardstock circle. Have the circle completely covered with the cotton this time. Make sure the items are tiny enough so that they fit within the half globe (you'll likely have to have most of the scene in the middle). When you are happy with the scene and everything is safely glued to the circle, put a bead of hot glue on the edges of the globe and lower it onto the circle.
Thank'ee for dropping by, and I hope ye enjoyed the tutorial.
The main materials needed are two-part plastic sphere ornaments -- the kind with a double hook holder at top, so that when pulled into two parts, each has a little hanging hole for a hook or piece of ribbon or cording (see the pictures). I had to order mine online; neither Hobby Lobby nor Michael's had the kind I needed.
Other materials are:
- glitter or fake snow
- some cotton or batting
- a piece of cardstock
- hot glue gun and glue sticks
- the things you wish to place inside
On the circle, glue down (I use glue dots) some batting or cotton, cut into a shape or angle to represent a little hill or snowy foreground.
Atop the cotton "snow," glue down the stickers or little paper shapes you are using. I used little shapes from some cardstock confetti, and some small stickers, to make a scene. I could have trimmed the back of a sisal tree and glued it in place with hot glue, to make the scene more dimensional.
I double-placed each animal cutout, by placing one cutout, putting a thick glue dot on it, and placing another identical cutout on top of it, to make it dimensional.
Now you place some fake snow into the half globe and hold it like a little bowl so it doesn't fall out. If you forget to add the snow into the little globe bowl (as I did), you'll have to partially glue the circle down, pull out the top of the circle as shown in the first picture, and put some snow in. I put clear big glitter circles in one globe, and tiny styrofoam balls into the other globes. The fluffy fake snow in a bag would also be pretty.
Put slow-setting hot glue around the edge of the half globe, and place the cut-out circle against it, with the scene sealed inside.
MAKE SURE that you have the scene oriented correctly before pushing the circle against the globe's edge.
Now you can put some glitter, tinsel, cord or ribbon (or nothing) along the edge to disguise where you glued the circle to the globe. I put more hot glue and then dabbed the edge into glitter poured onto a paper plate.
Not Shown:
Pretty Scallops: You can get a scalloped circle somewhat larger than the back of the ornament, and glue it to it, to make a pretty "frame" around the scene.
Stand-up Scenes: To make a stand-up scene to go atop a Mason jar or other jar or box, it's a slightly different process. You can get some tiny sisal trees and figurines (I have some tiny deer I got in the dollhouse section of Hobby Lobby) and put them on top of some batting or cotton glued to the cardstock circle. Have the circle completely covered with the cotton this time. Make sure the items are tiny enough so that they fit within the half globe (you'll likely have to have most of the scene in the middle). When you are happy with the scene and everything is safely glued to the circle, put a bead of hot glue on the edges of the globe and lower it onto the circle.
Thank'ee for dropping by, and I hope ye enjoyed the tutorial.
Subscribe to:
Posts
(
Atom
)